
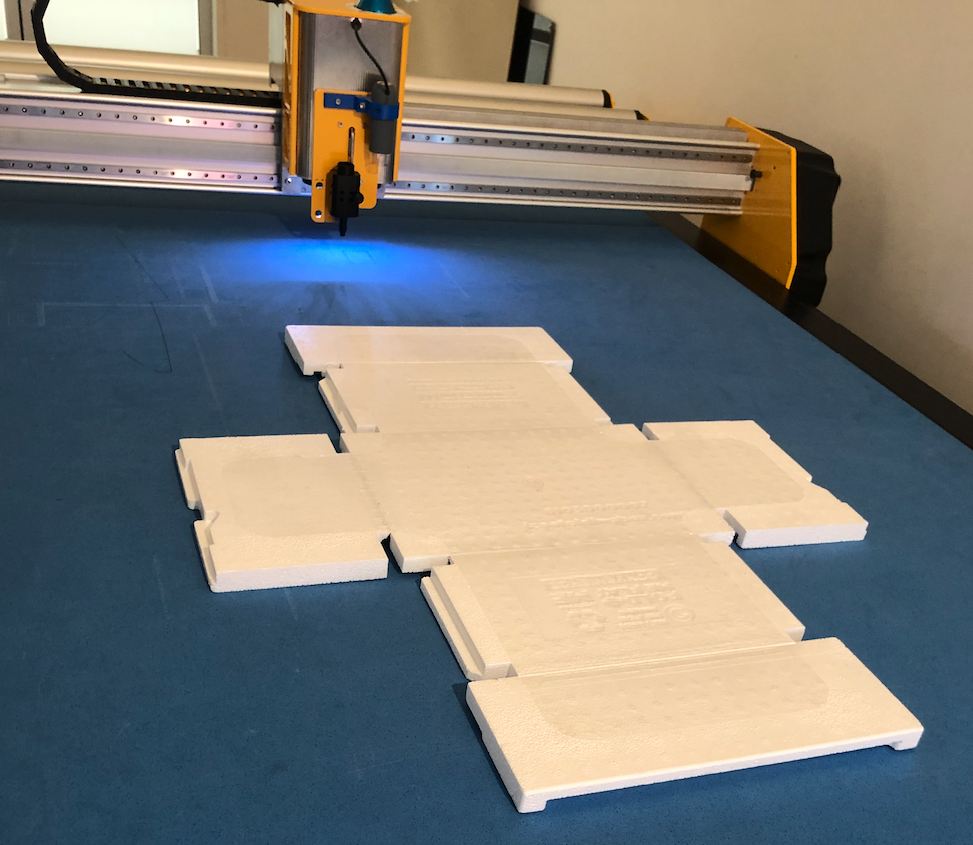
For these cuts we have a polystyrene box covered on one side by a thin plastic film.
The goal is to cut a cross shaped section on the inside of the film. This will leave a clean edge on the sides of the box while the intact plastic film reinforces the hinges.
Preparing the cut file - Vectorworks
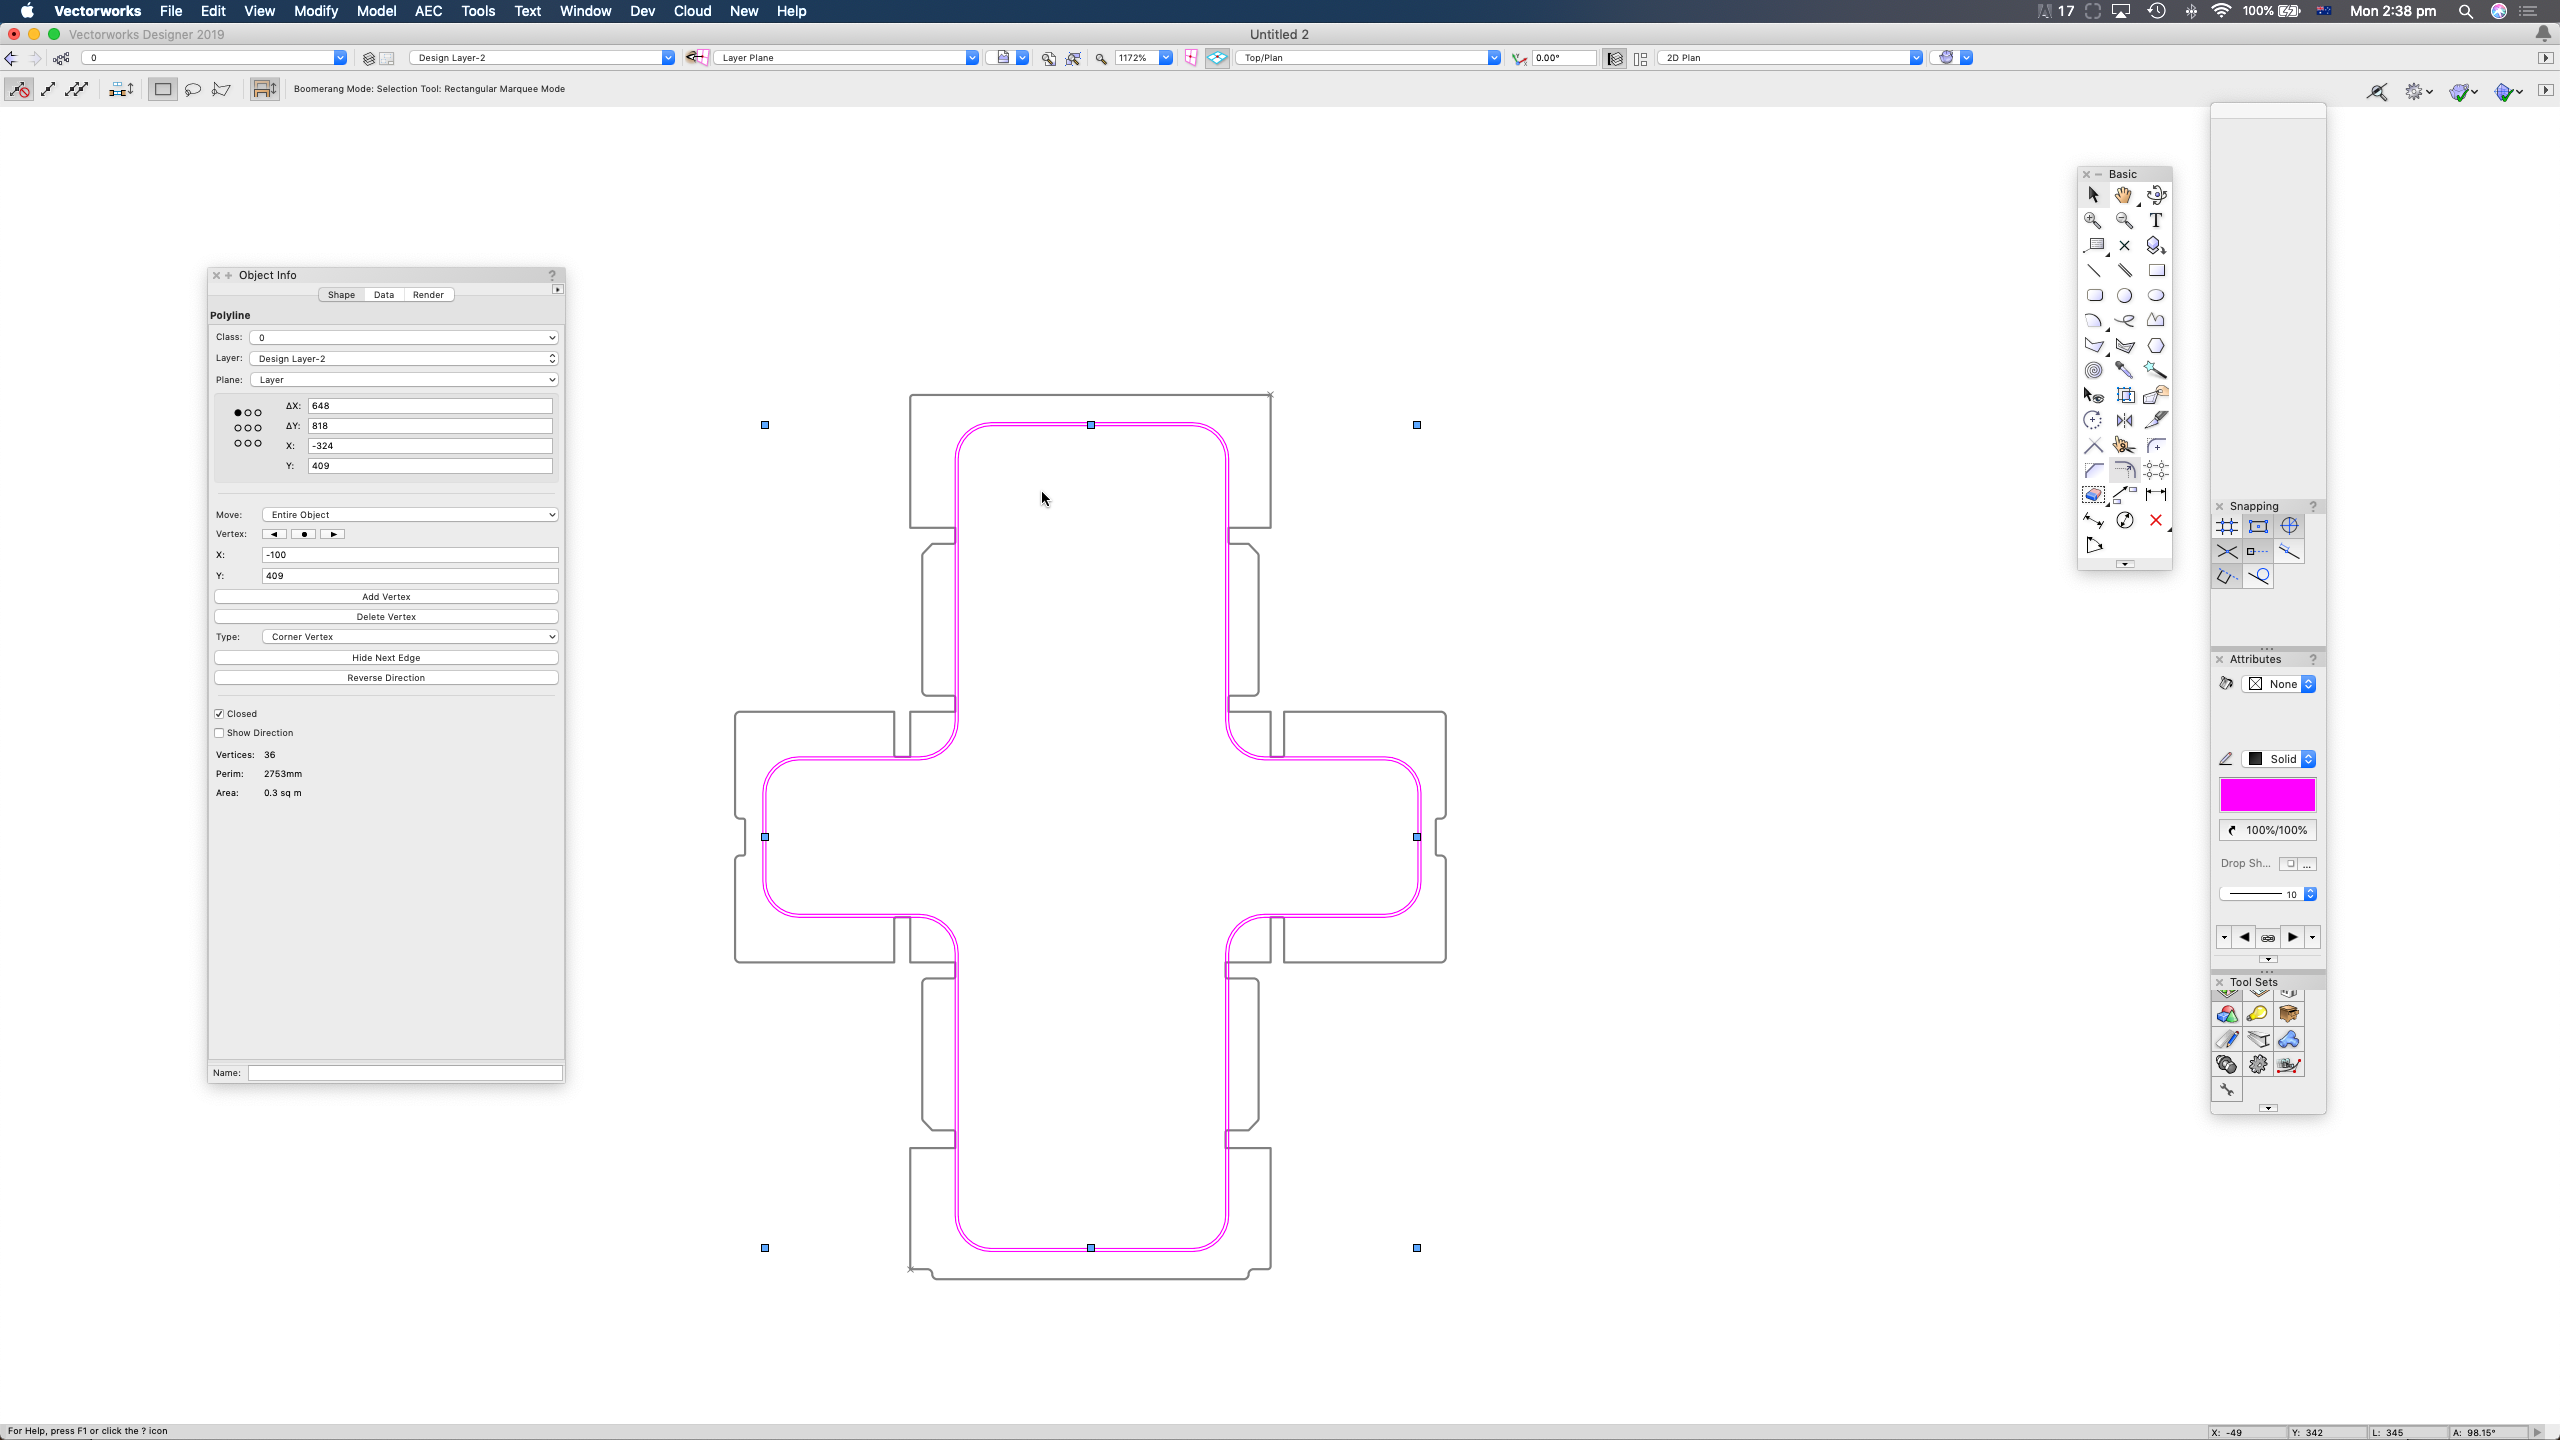
In the below image, the grey (reference path) shows the exterior of the polystyrene box and the magenta (envelope) path shows the pattern to be cut. Both paths were supplied by the customer, but the magenta / cut path was not to scale.
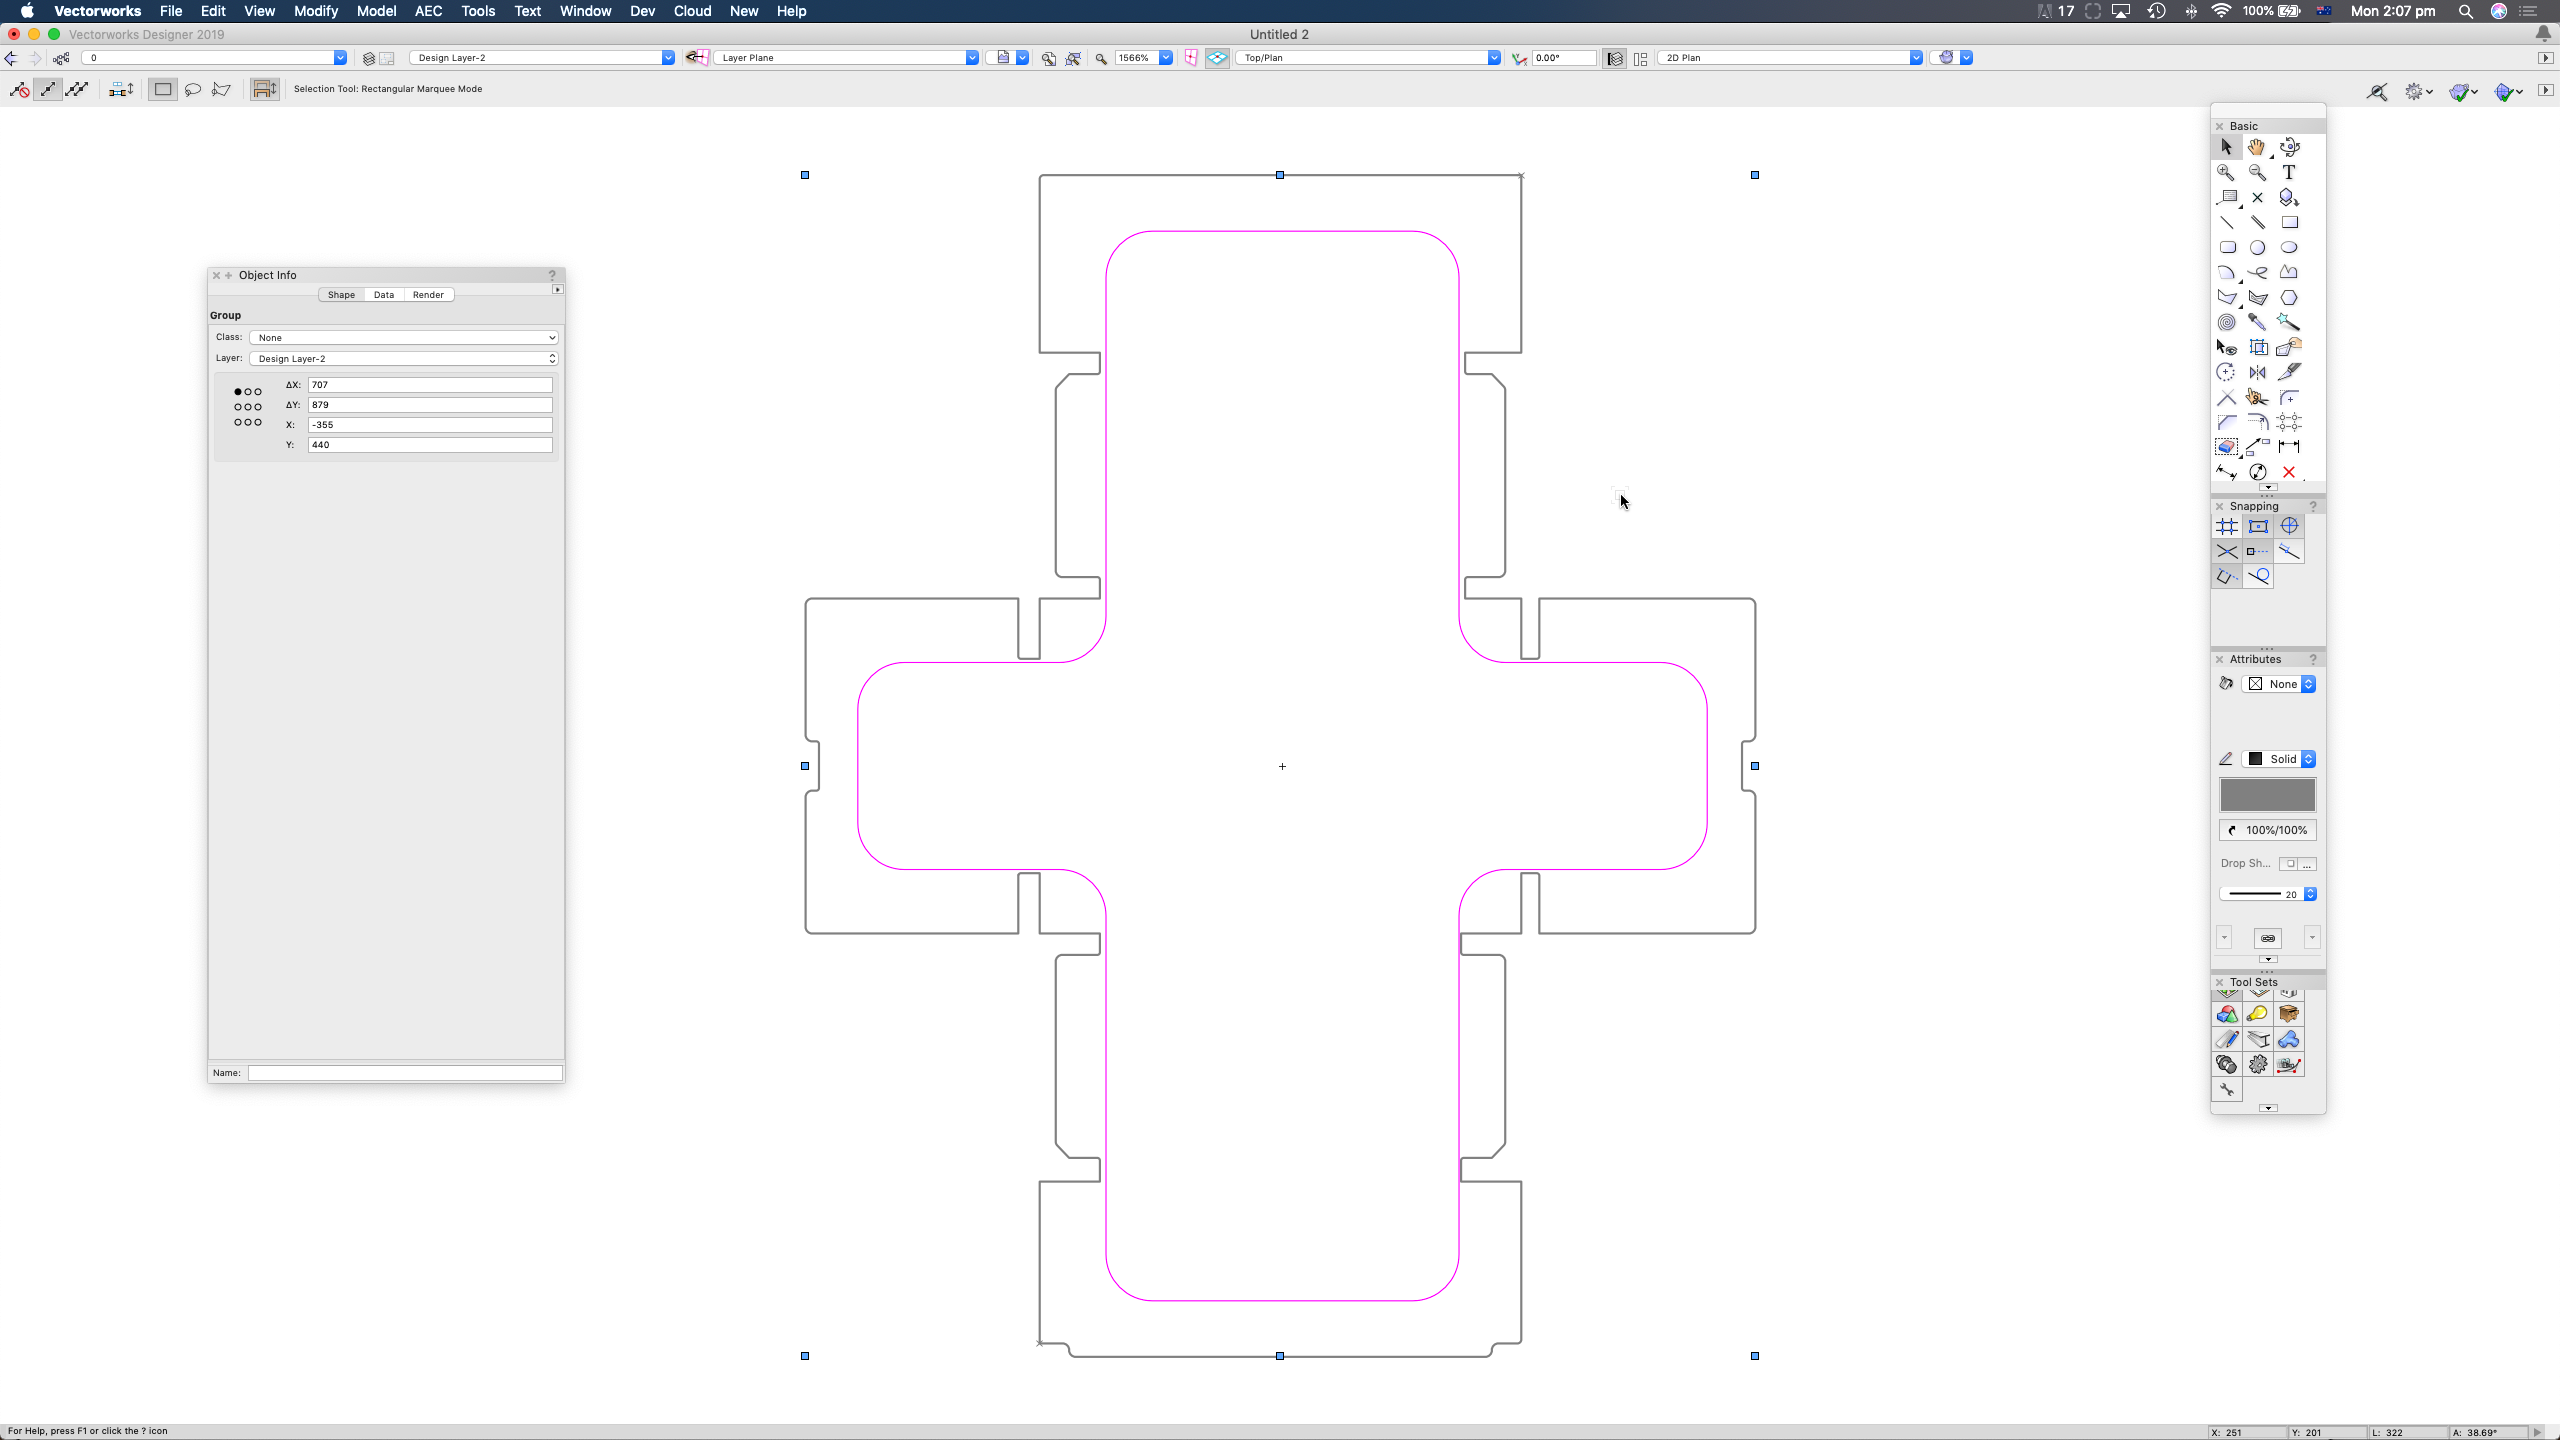
The first step was to centre and scale symmetrically the magenta path in order to leave a 3mm margin between the cut path and the innermost cut outs present on the box.
The above screenshot shows the unscaled cut path within the correctly sized box.
There are many ways to scale the cut path to the desired size, this method is probably the most intuitive.
Selecting Scale Objects... will present us with the following window.
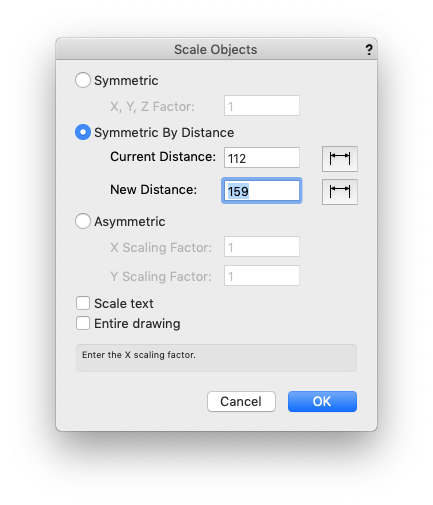
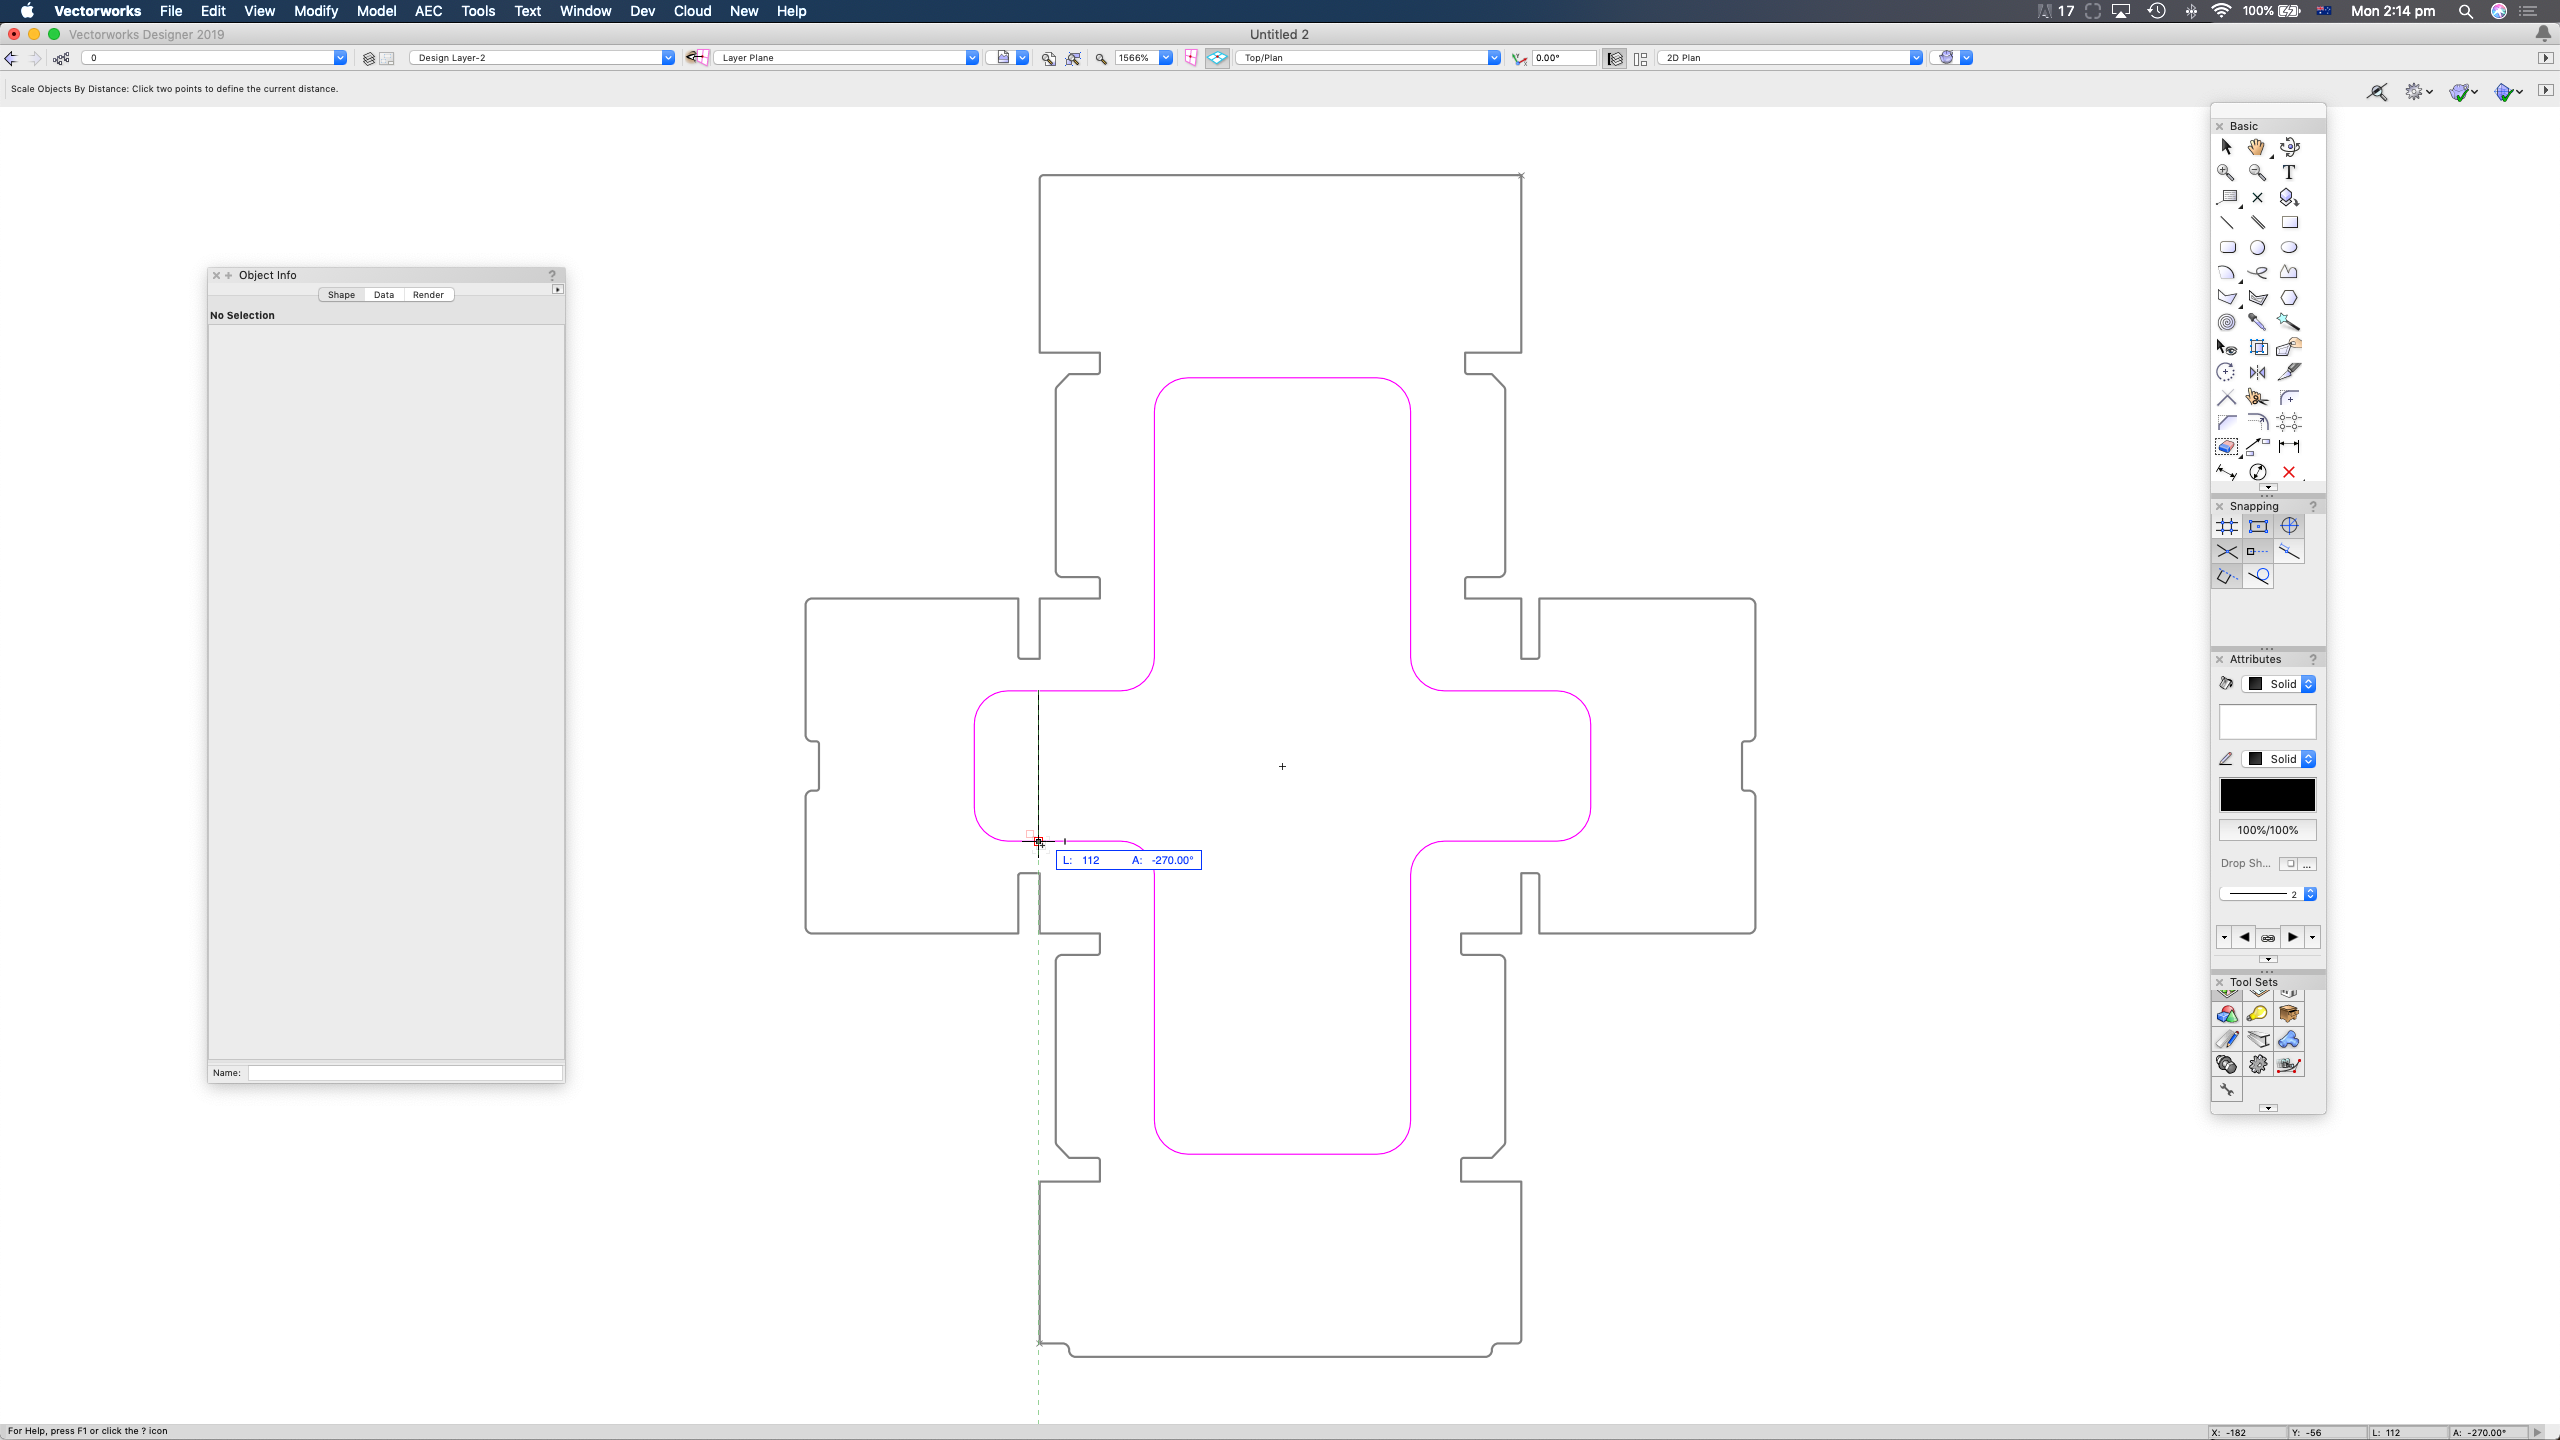
Clicking the button to the right of the Current Distance field will allow us to measure two points on the drawing to get our current size. Shown below.
Now we repeat the same process for the New Distance, this time selecting the gap between the box cut ins to be our new size. Shown below.
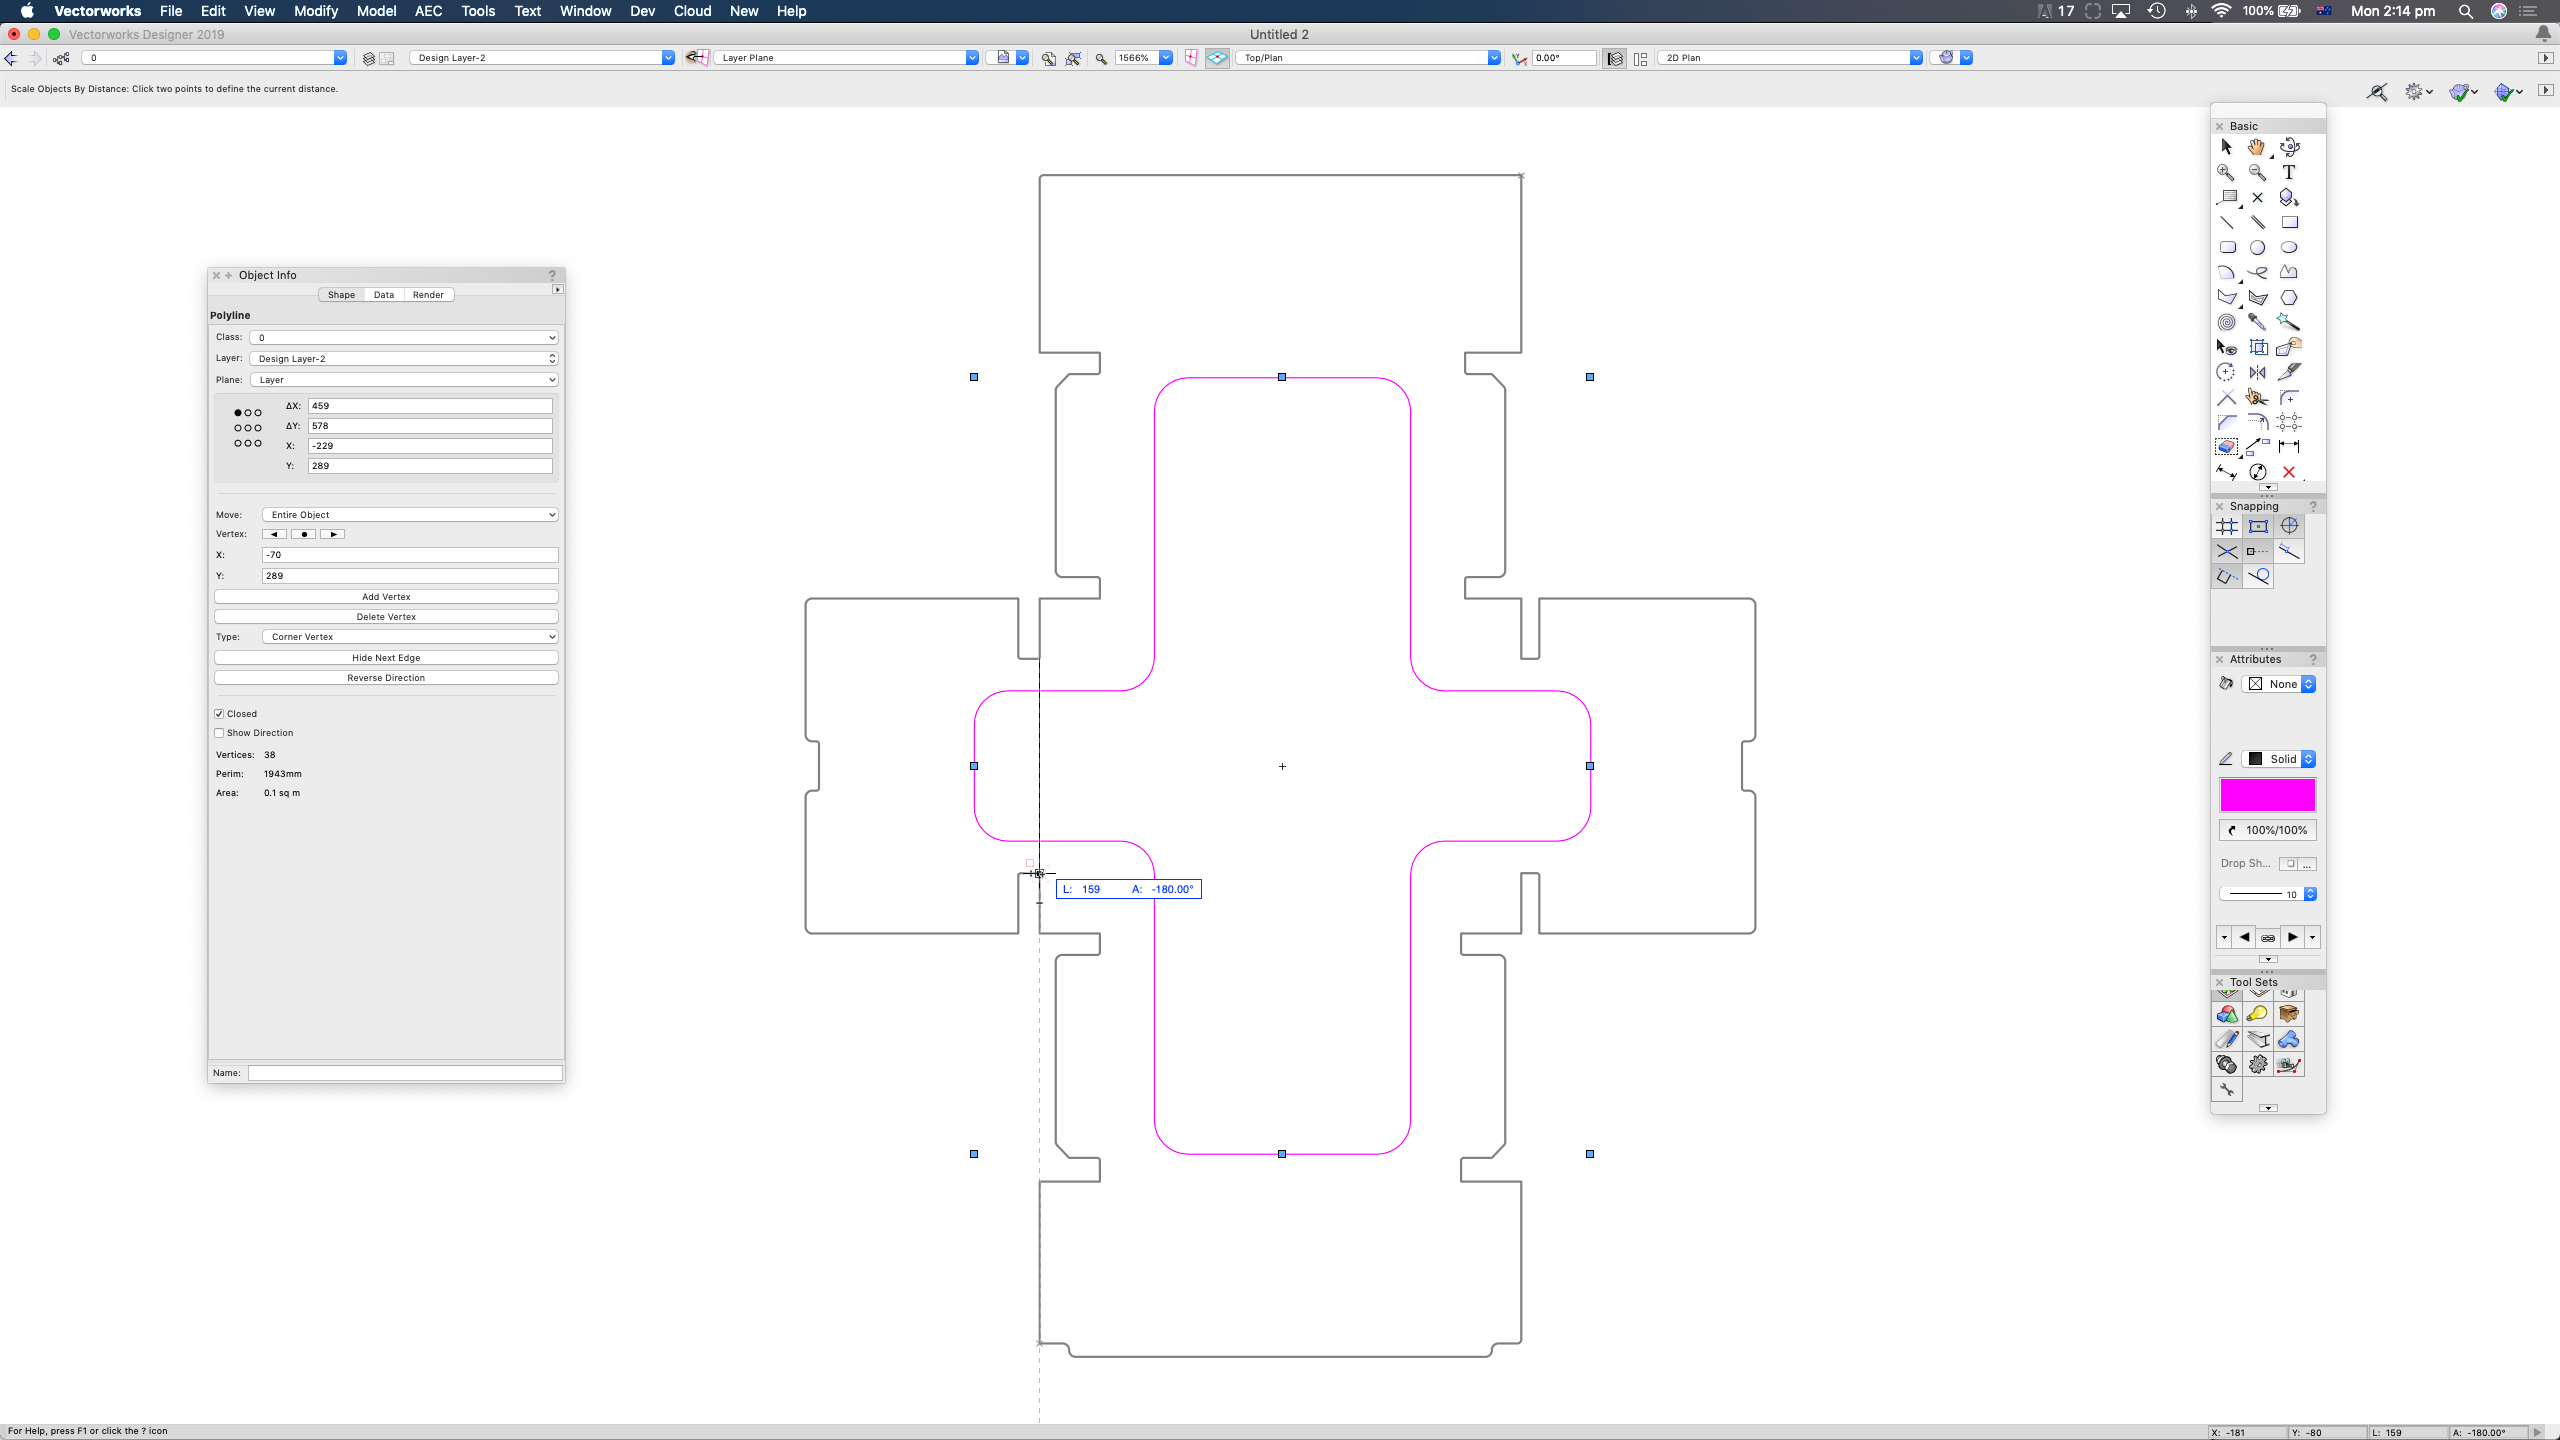
Make sure you don't have Entire Drawing checked and click ok. Our envelope is not centred and the exact size as to match the box's cutouts.
However, this isn't what the customer ordered. They want the cut path to be 3mm inset.
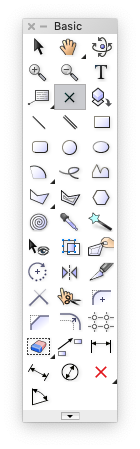
The highlighted tool below in called the Offset Tool. This will enable us to create the 3mm inset path.
All you need to do is select the cut path, specify that 3mm offset in the Offset Tool's specific settings (top left of the window) and click inside the cut path. In the below screenshot you can see the inset path and the original cut path.
Delete the original path.
Adding alignment marks.
The last aspect of our drawing that we need is the alignment marks.
It may be tempting to line the file up using trial and error, but this won't be an efficient process and the time will add up over multiple cuts.
To aid ourselves with locating the cut path correctly, we can use alignment marks instead.
Tangent's Vectorscript (VS) import uses locus points to denote alignment marks. We'll need to create two for our alignment. Locus tool pictured below.
Each locus is created with a single click.
Set the colour in the attributes selector to be green
(RGB: 0, MAX, 0).
Make sure object snapping is turned on, select the locus tool and click once in the bottom left and top right corners of the box path.
Group the remaining cut path, the reference path and the loci together and you're ready to export.
As we're using colours to denote element types, the Vectorscript export (VS) should be used.
Importing, aligning and cutting - Tangent 2019
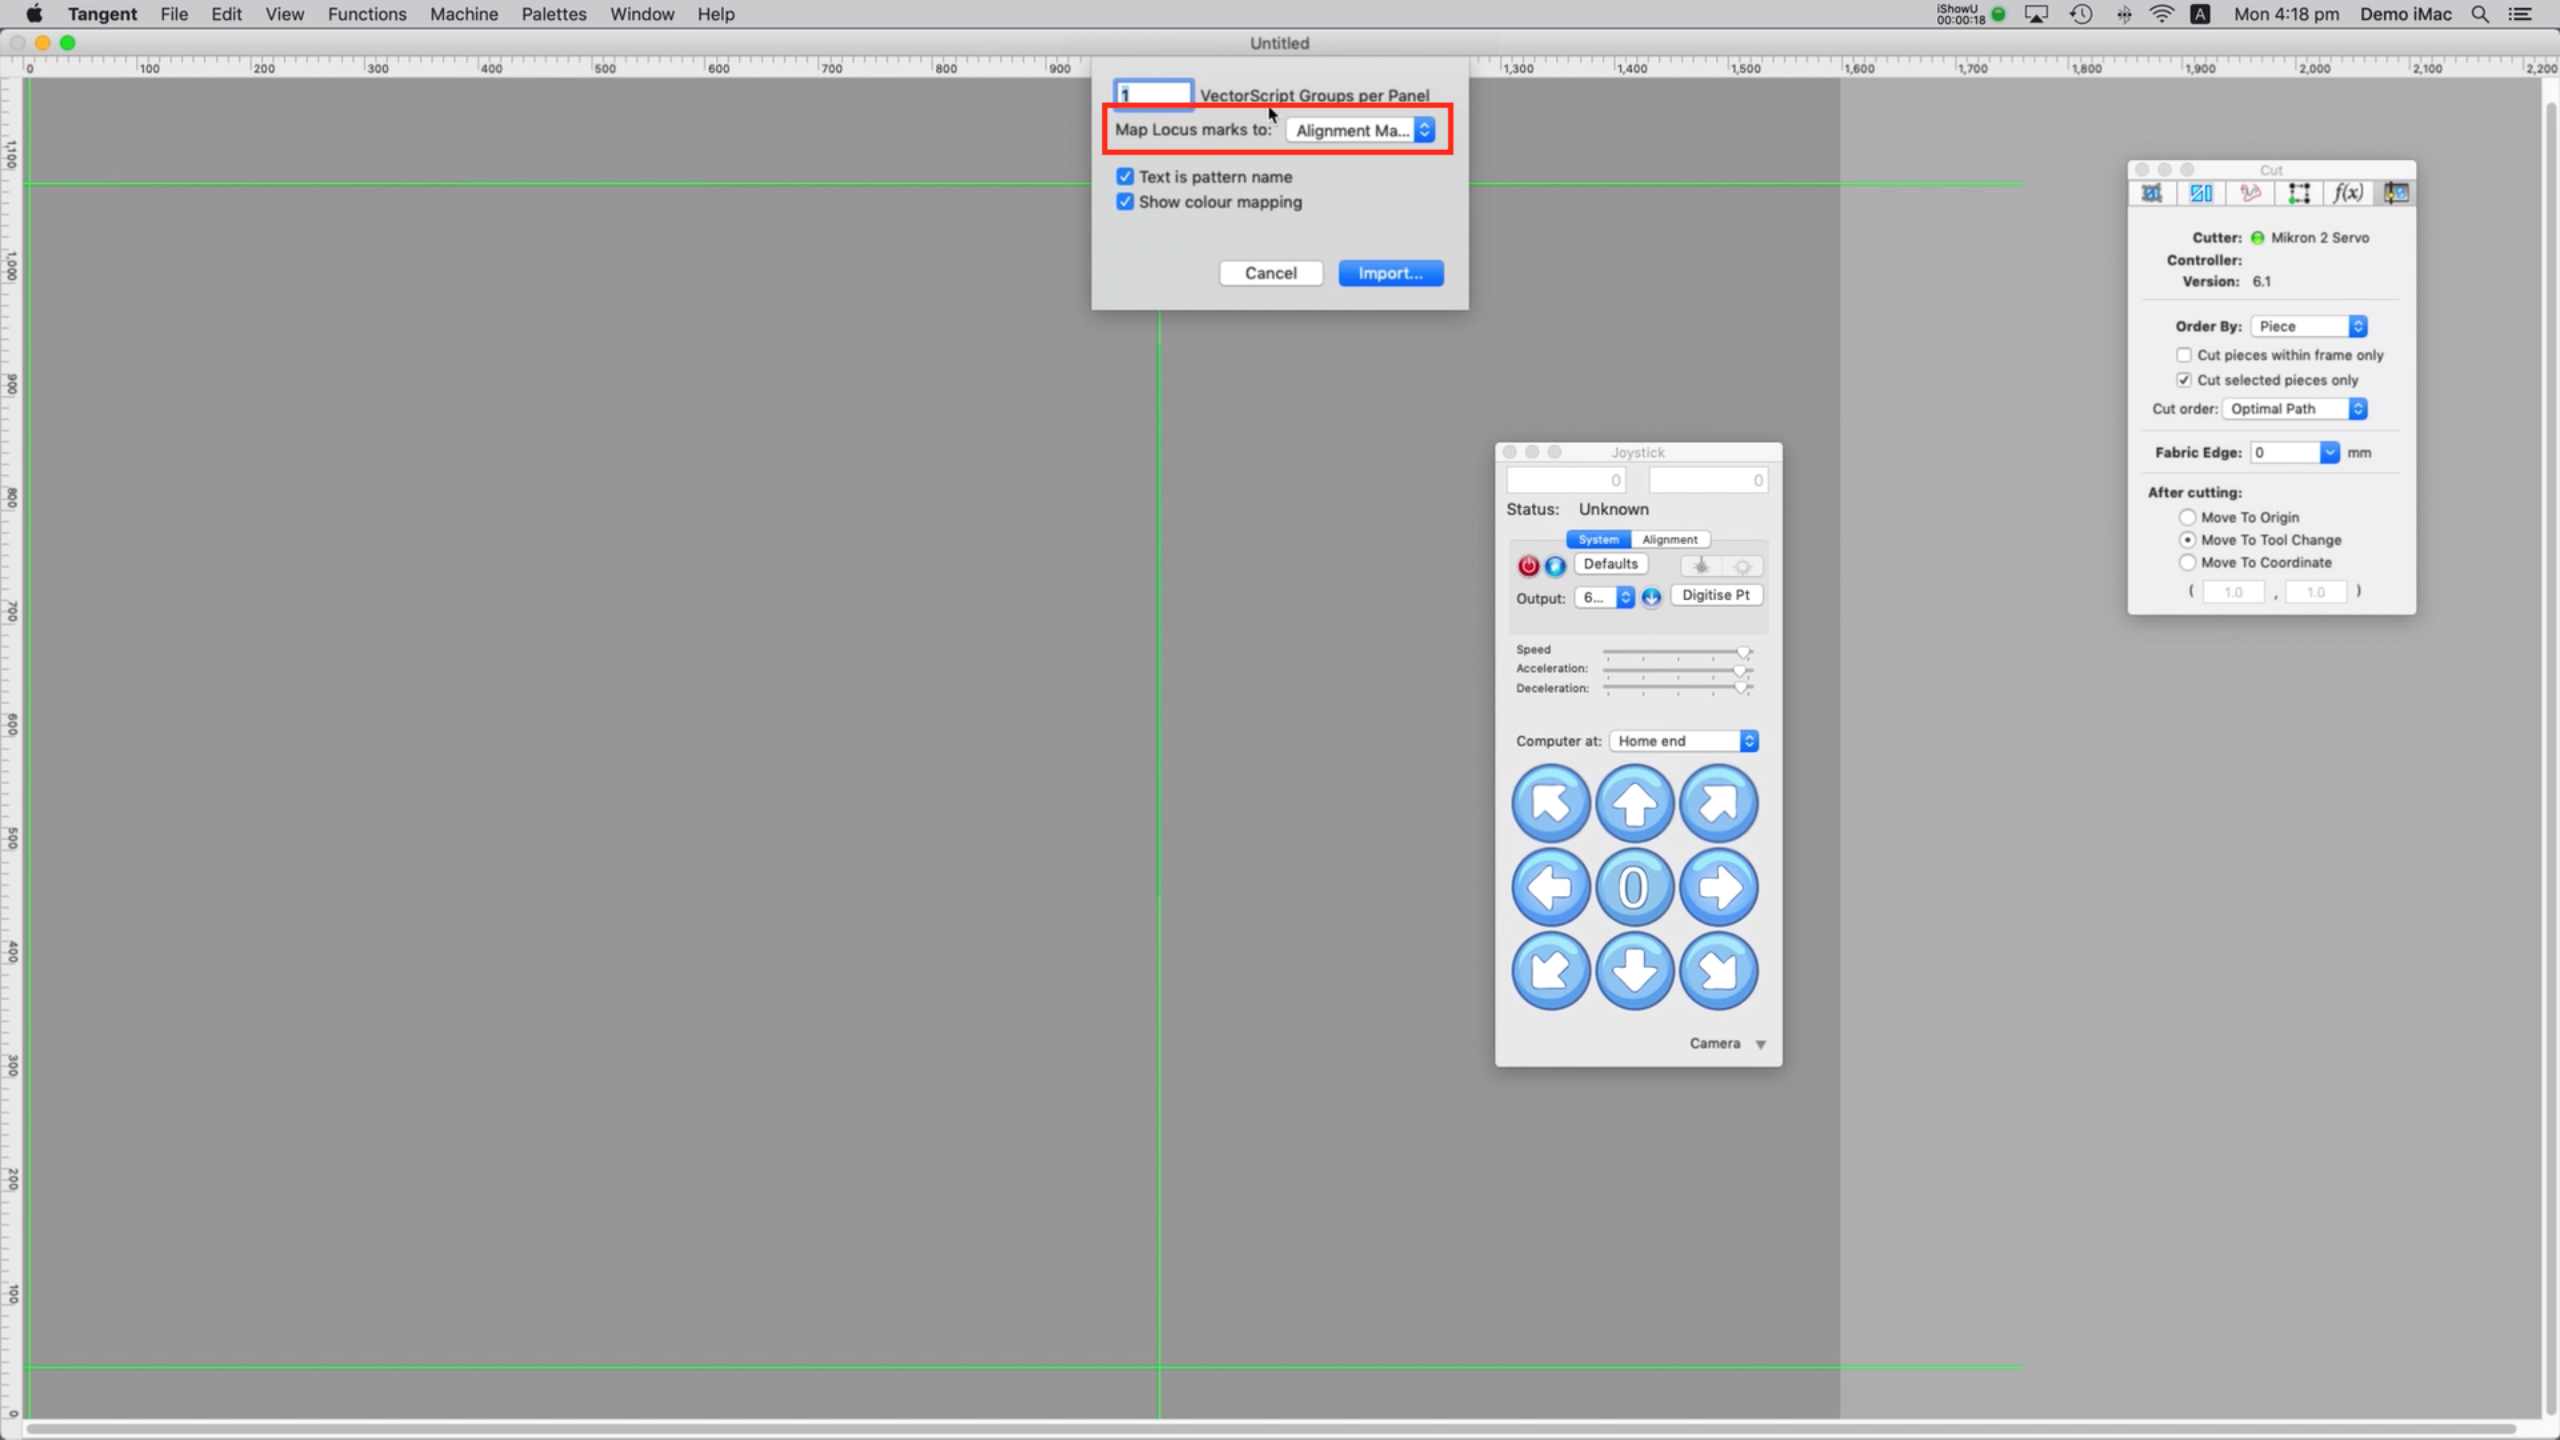
First we import the above file into Tangent.
As we used colours to assign paths, the only import option that we need to deal with is the setting that specifies how Tangent should interpret loci. As registration marks today.
The polystyrene box is on the table and our file is in Tangent and roughly aligned, so now all we need to do is accurately line the two up.
Open Tangent's software joystick and the Cyclops view within that.
Navigate cyclops via the joystick until you can see the bottom left corner of the box. Click right on the corner and the graticules should jump to that position. Click the add alignment mark button.
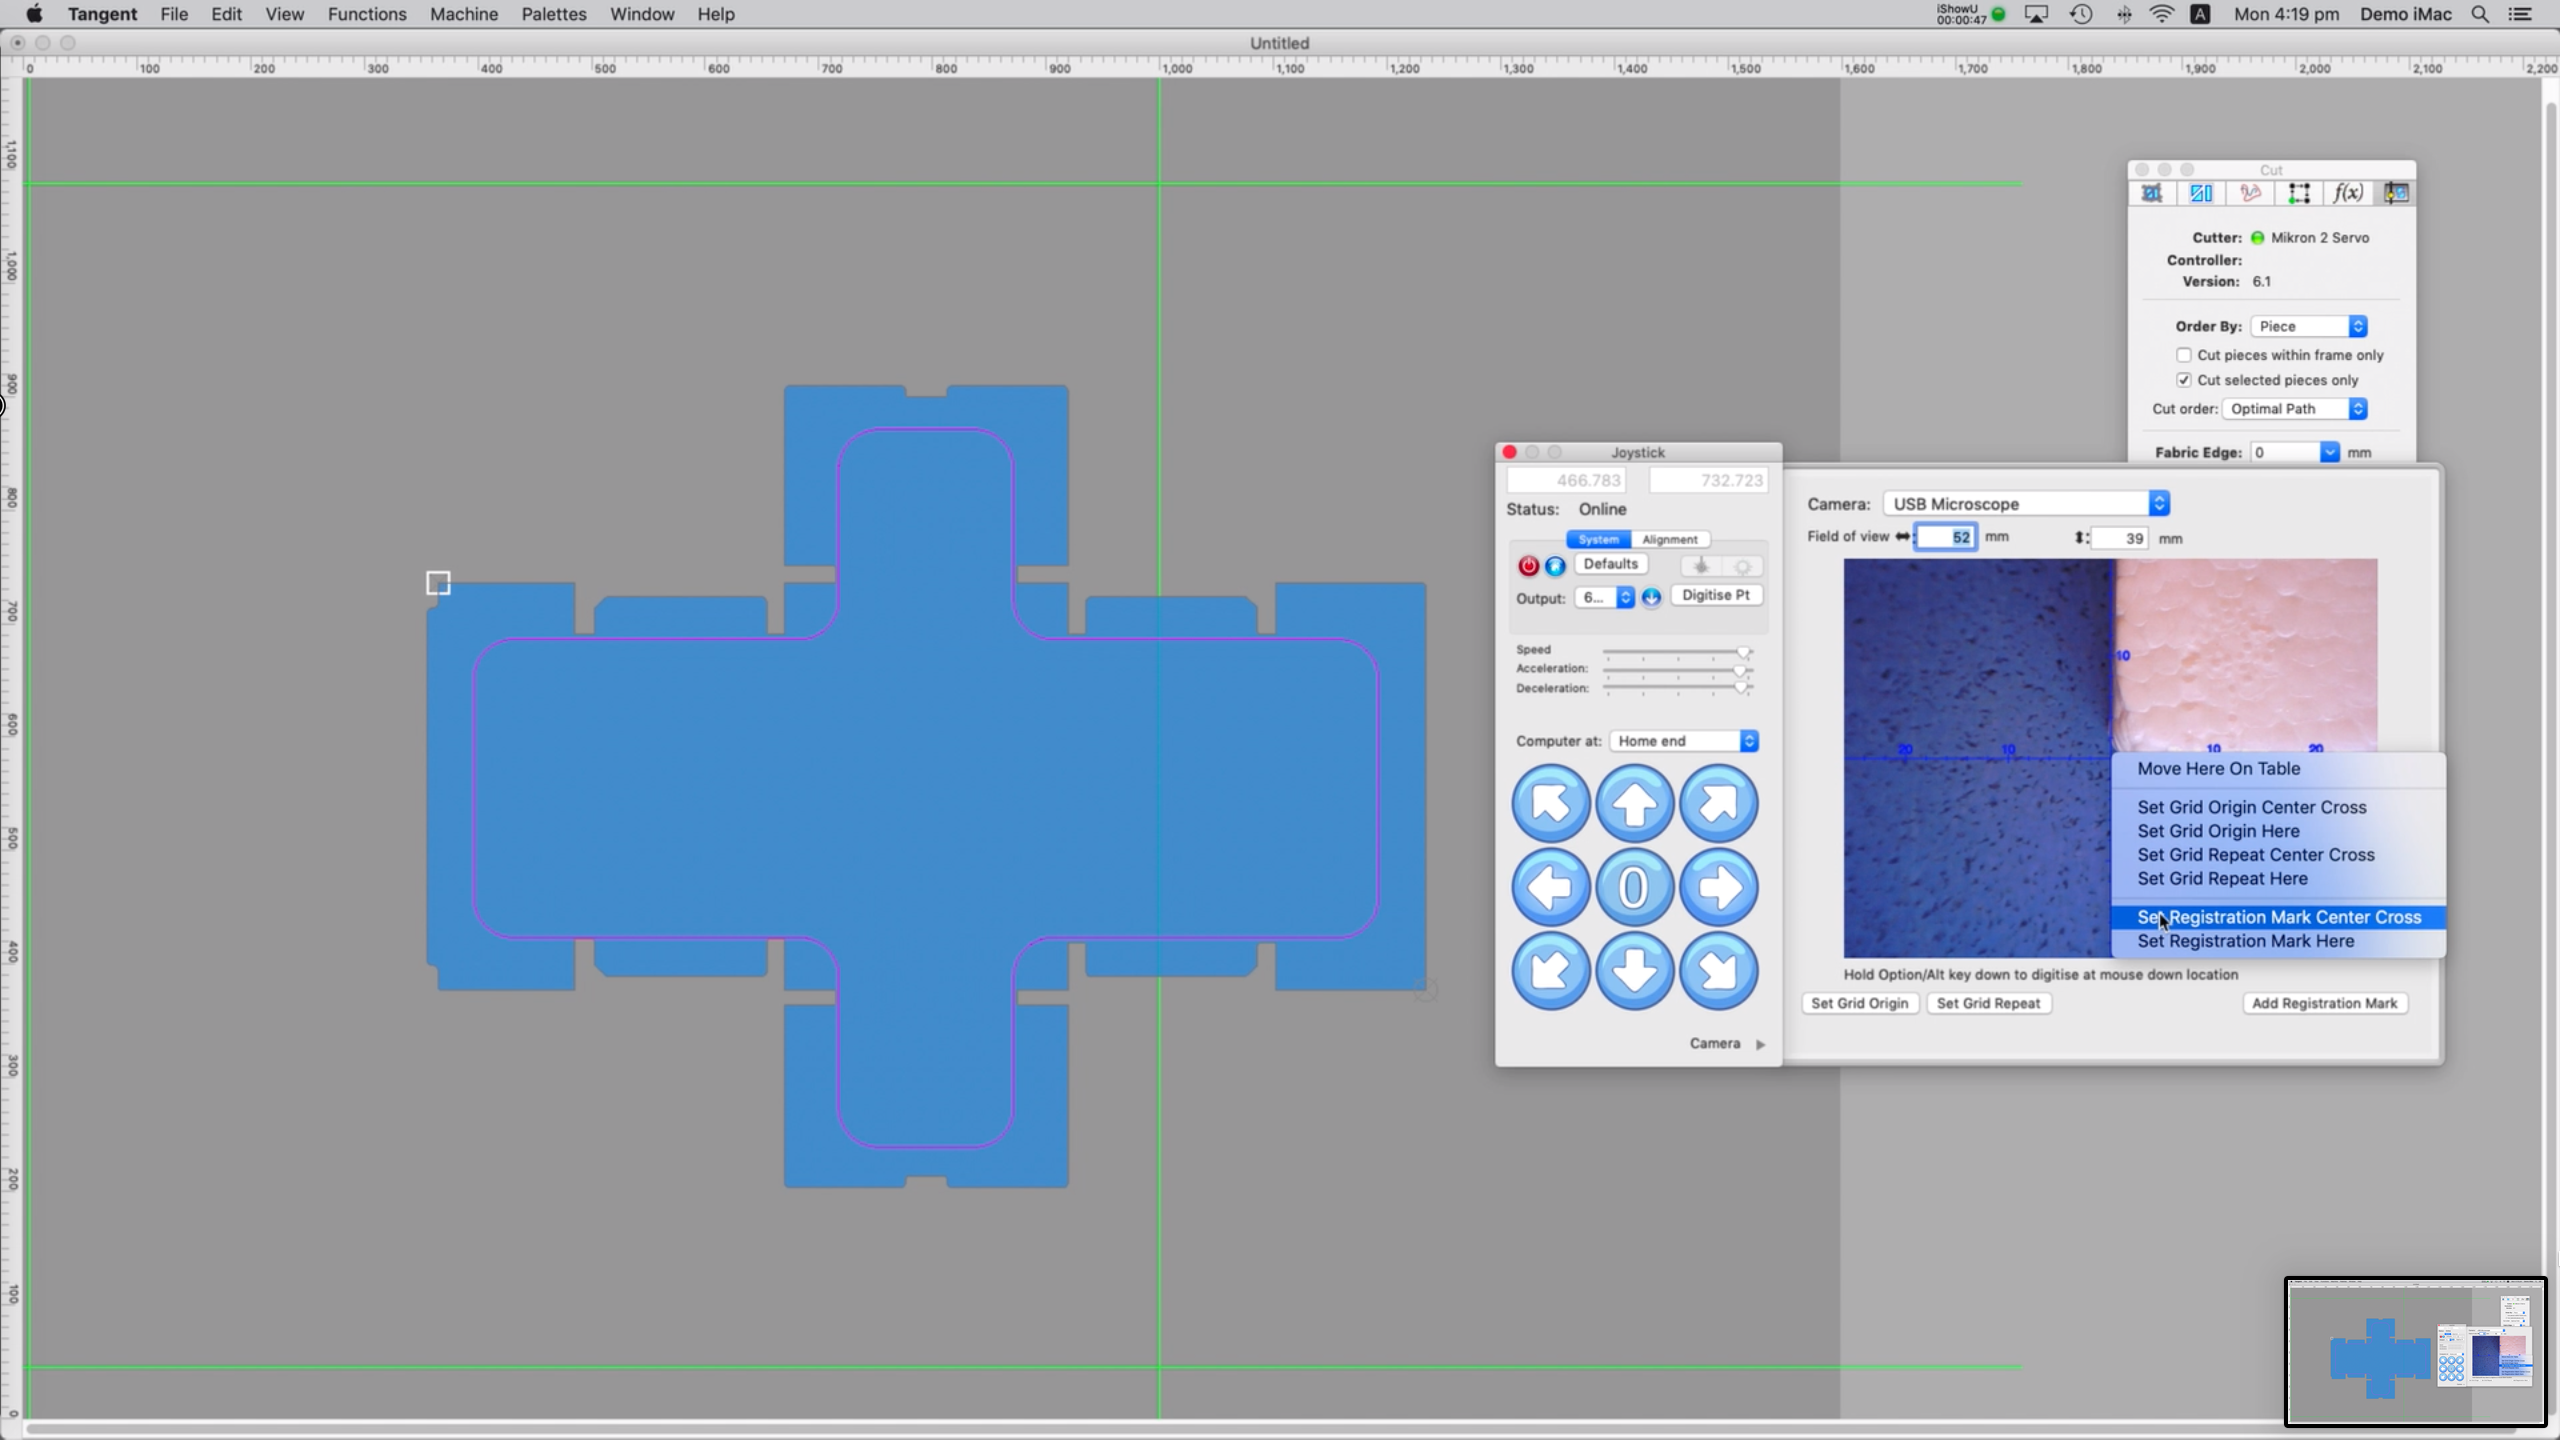
Repeat the process for the top right corner.
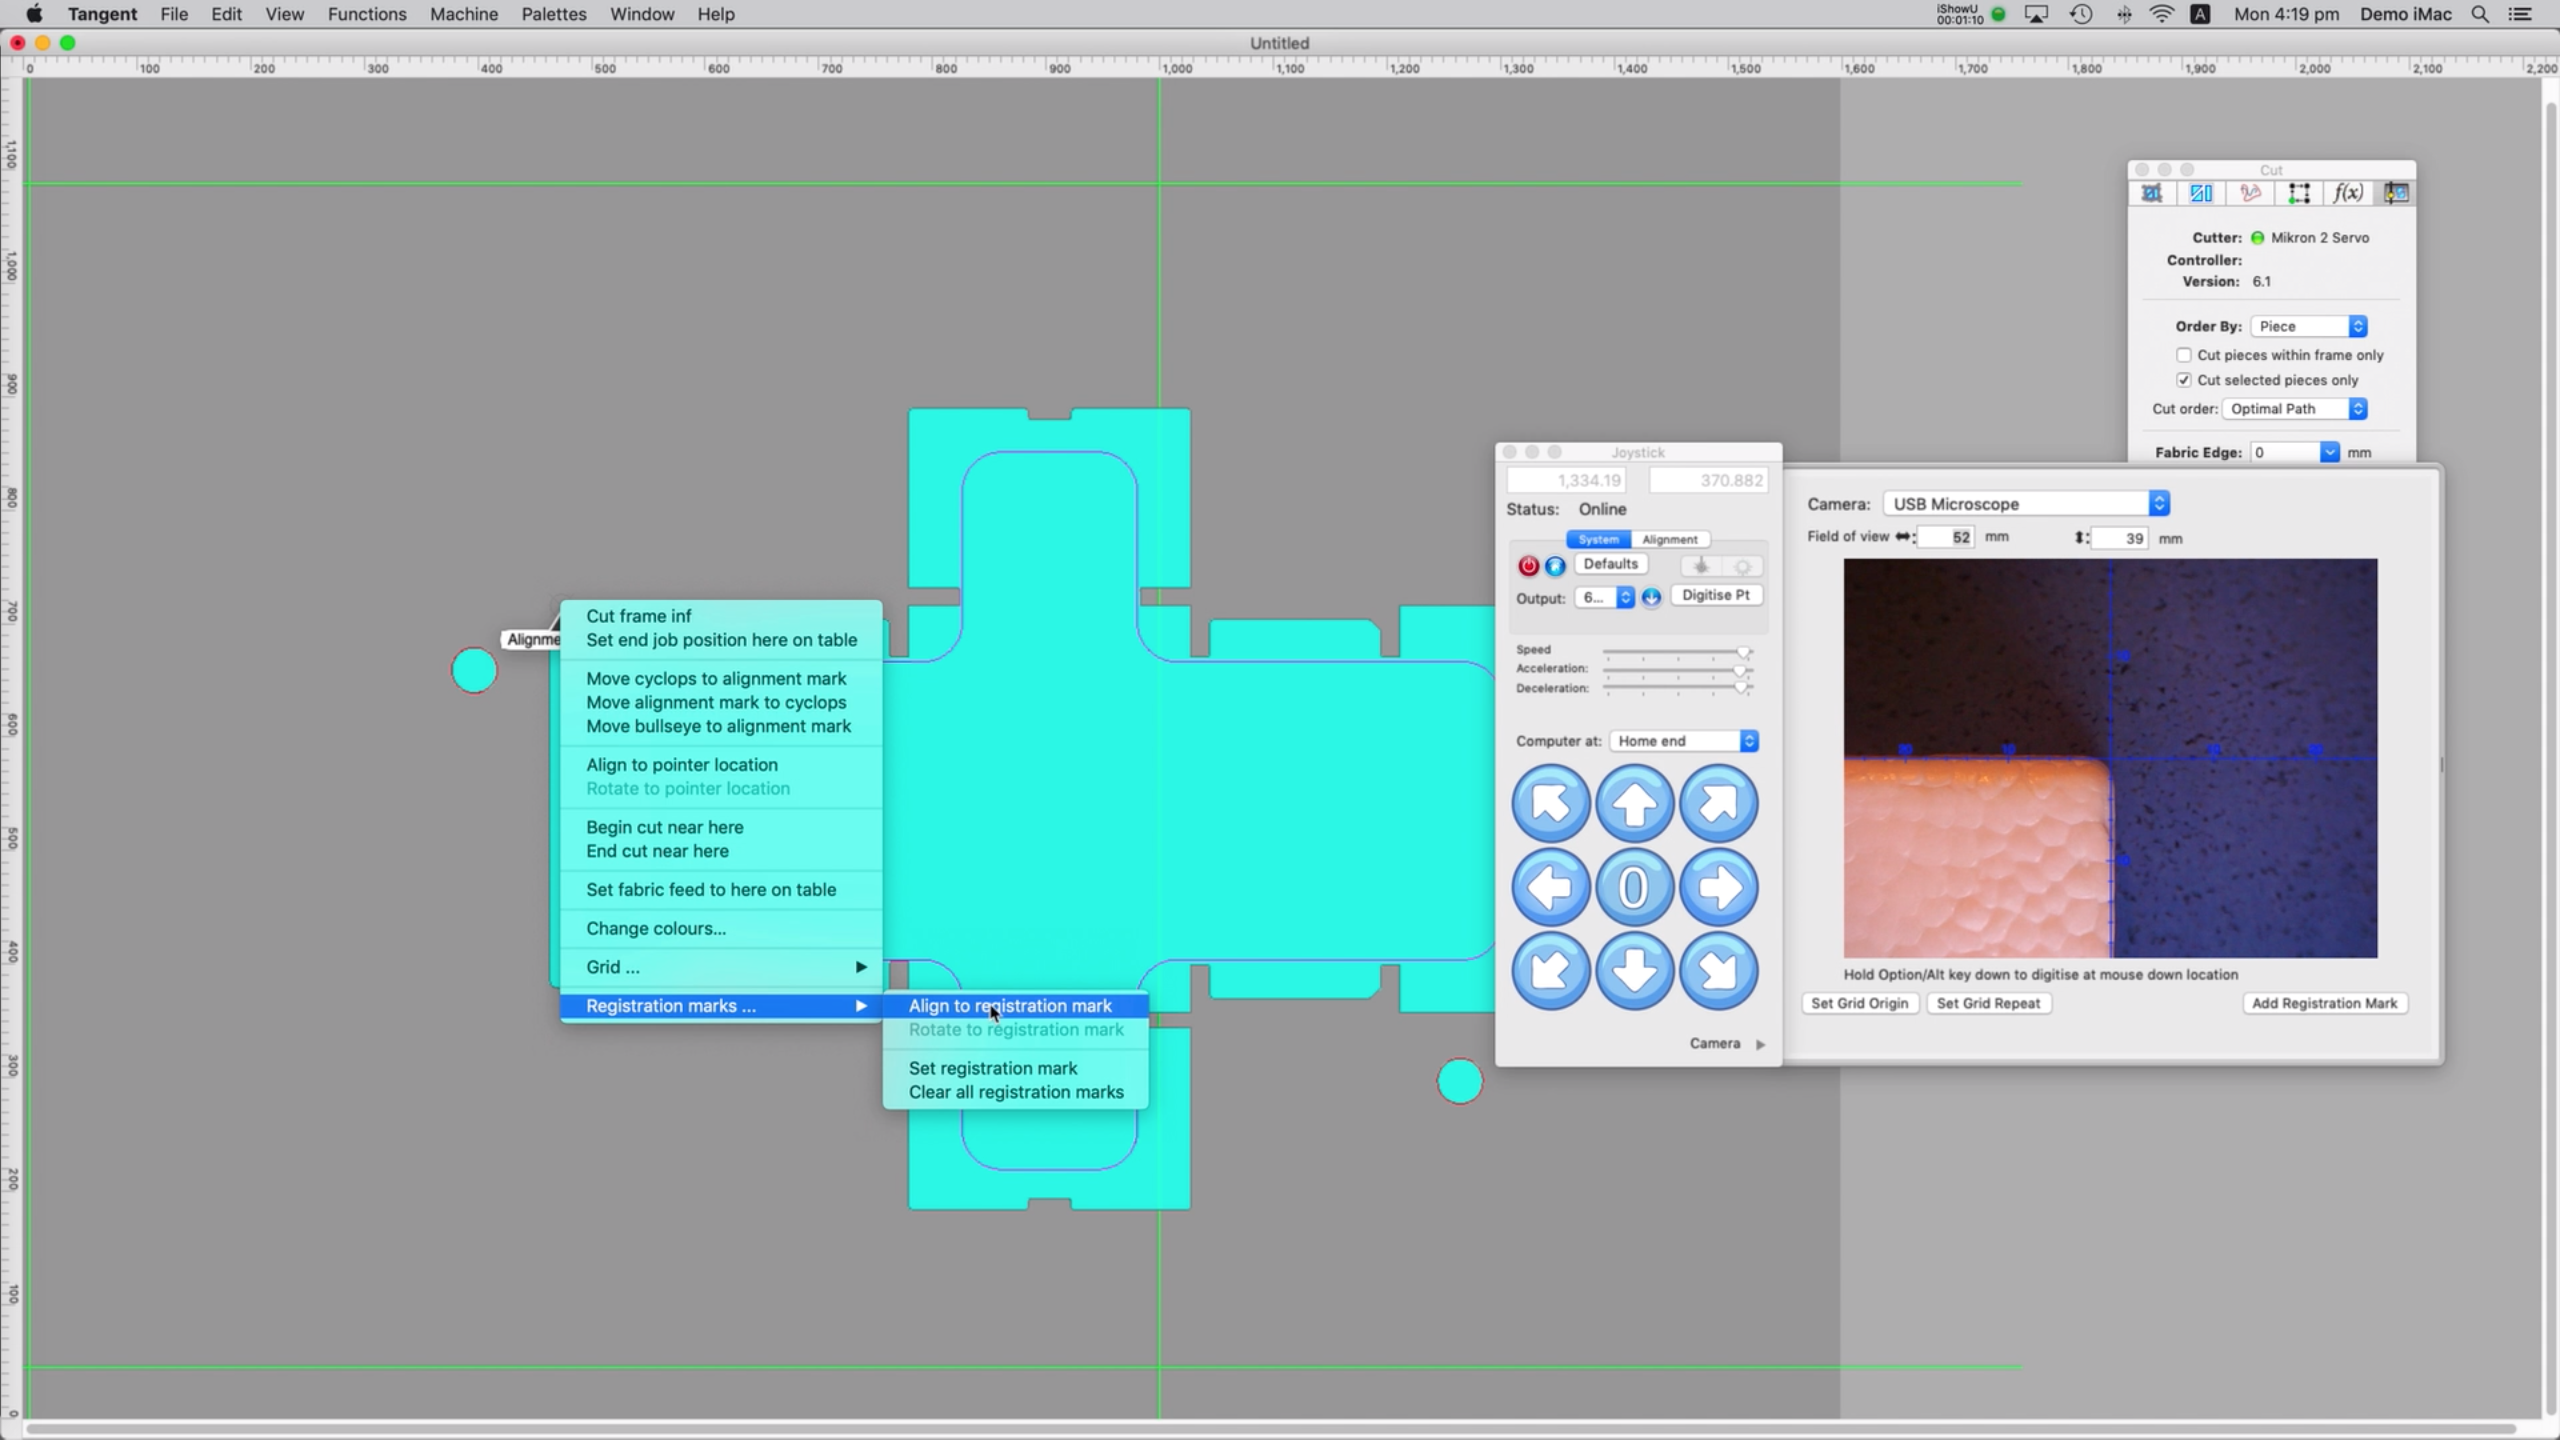
Now that we have the corners of the box specified in Tangent's queue we can align our files marks to them.
Starting with the bottom left corner of the box's cut path (top left in Tangent's display), right click (or control + click) the box's alignment mark and select Align to Registration Mark. Now click the registration mark that was added to Tangent's queue first (the bottom left point of the physical box).
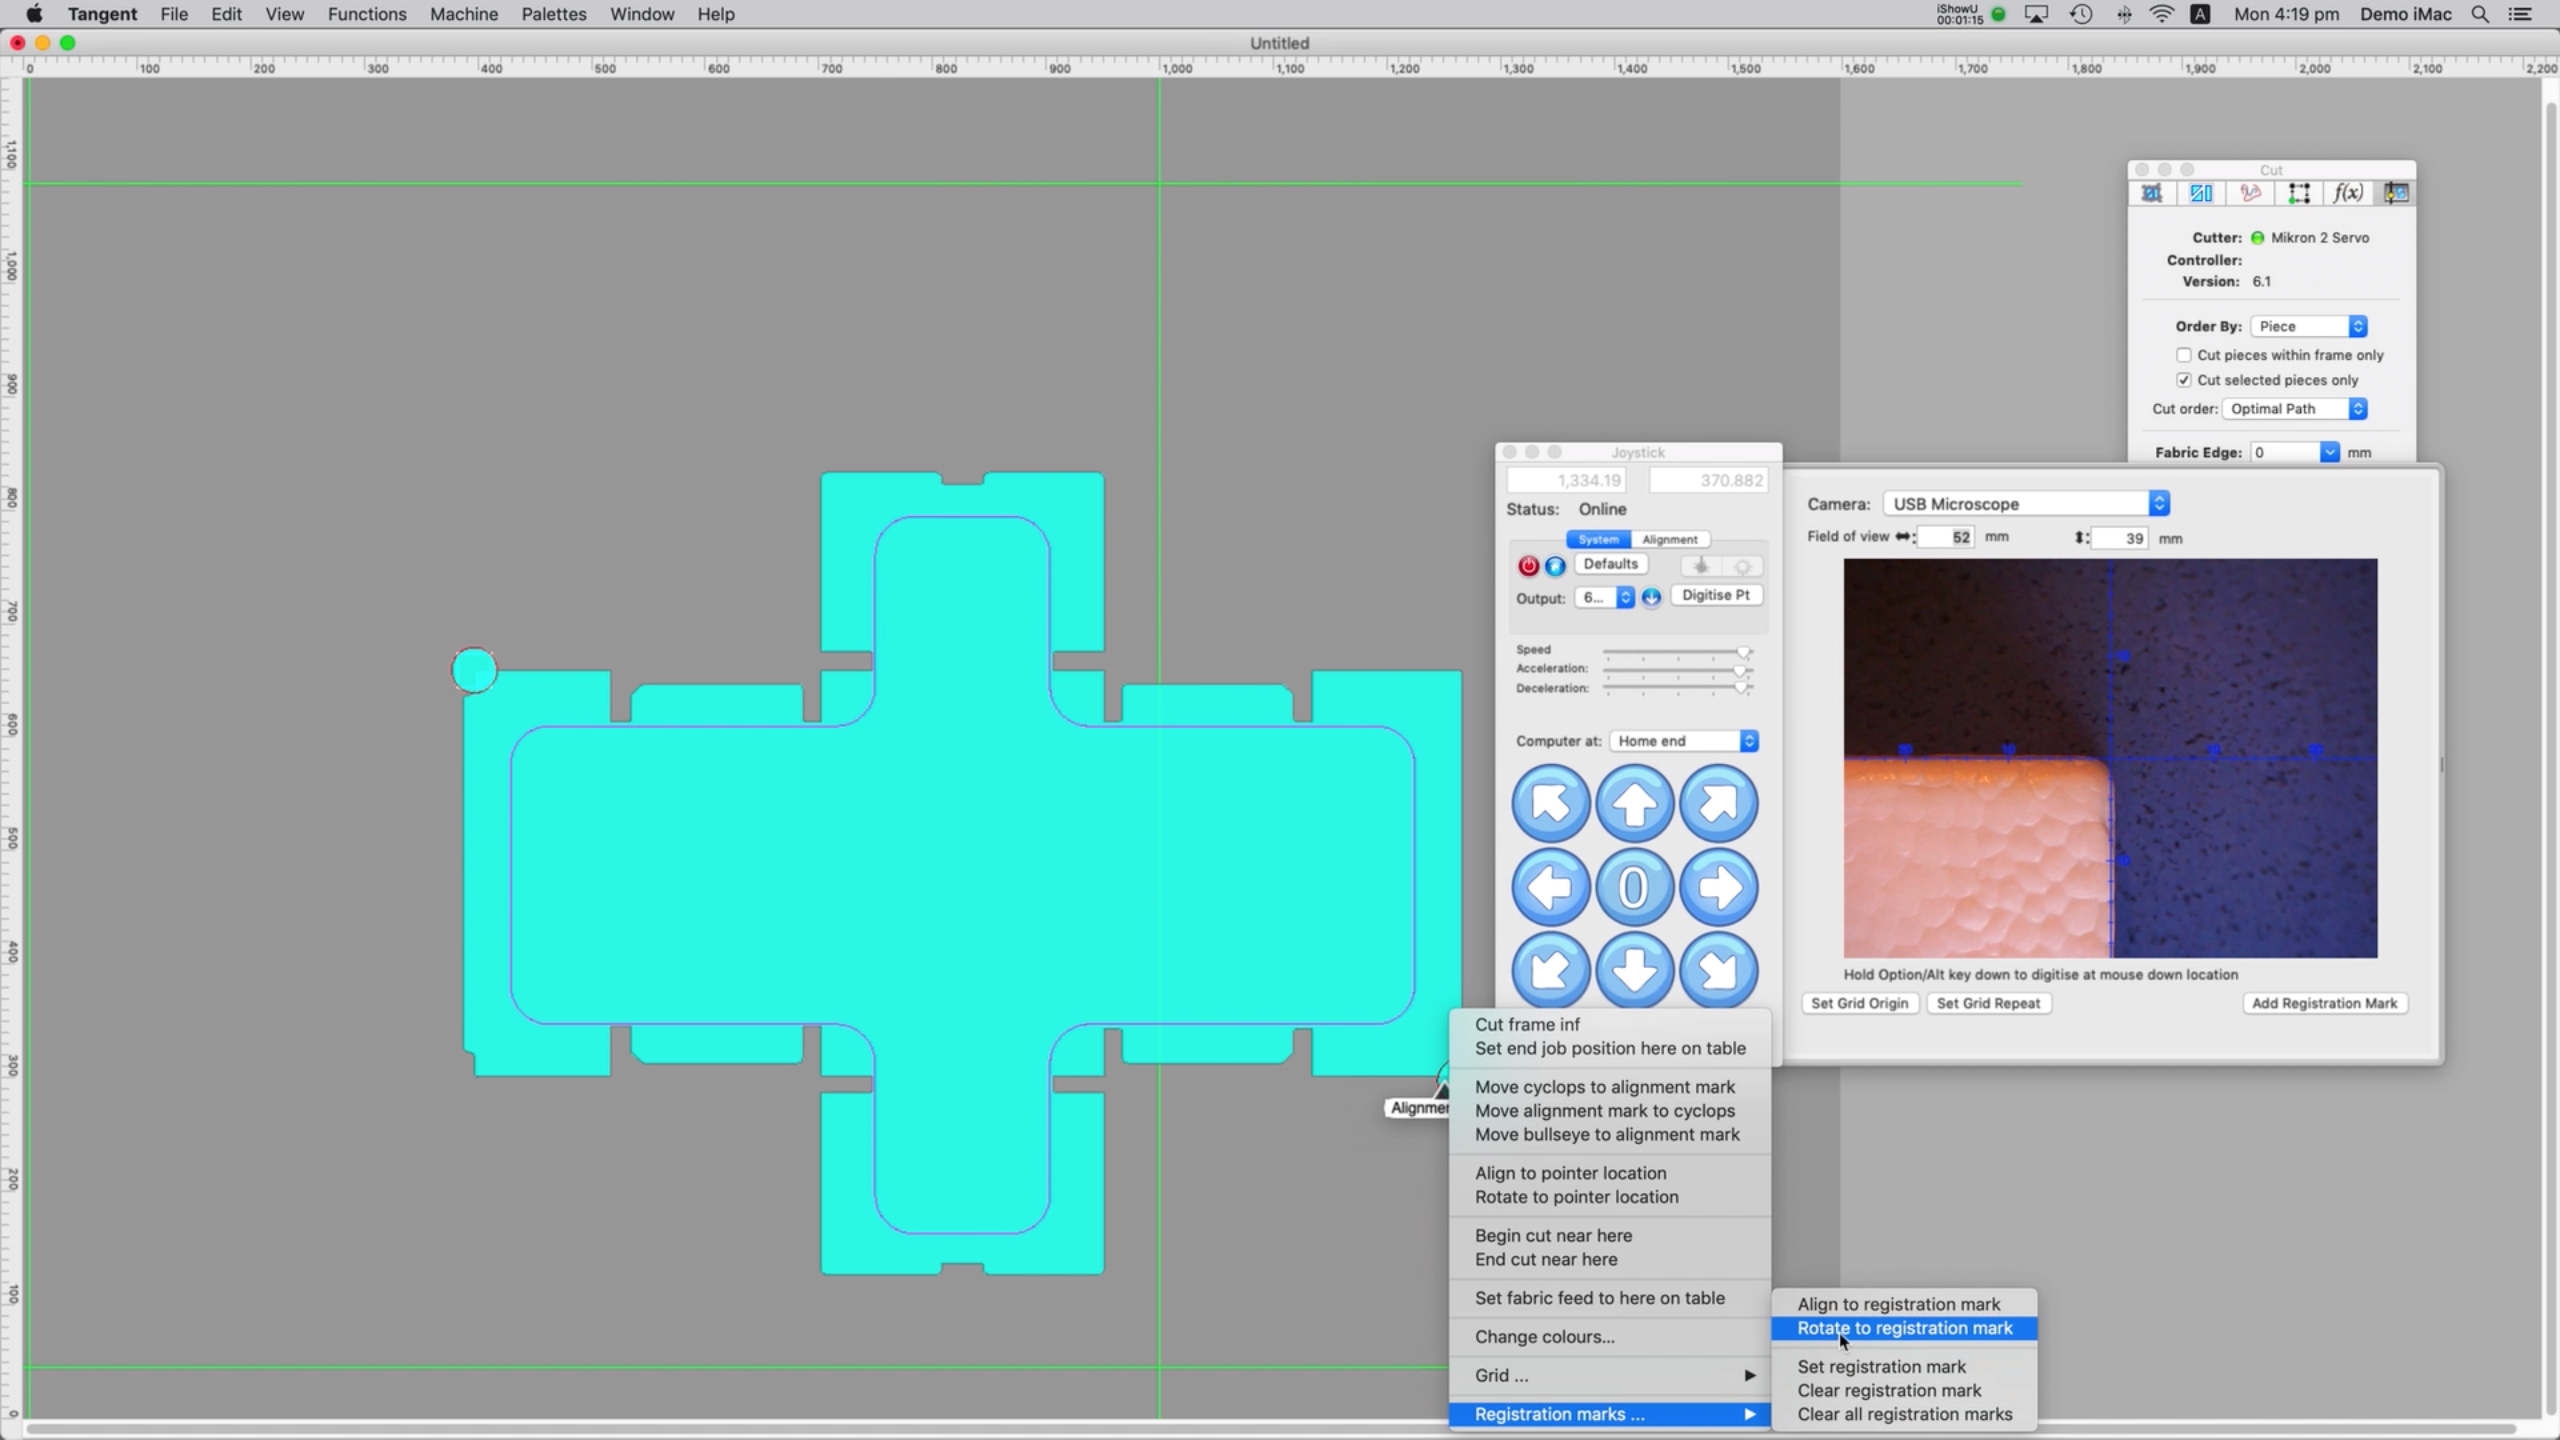
For the next point, the process is the same, but click Rotate to Registration Mark instead and select the top right registration mark.
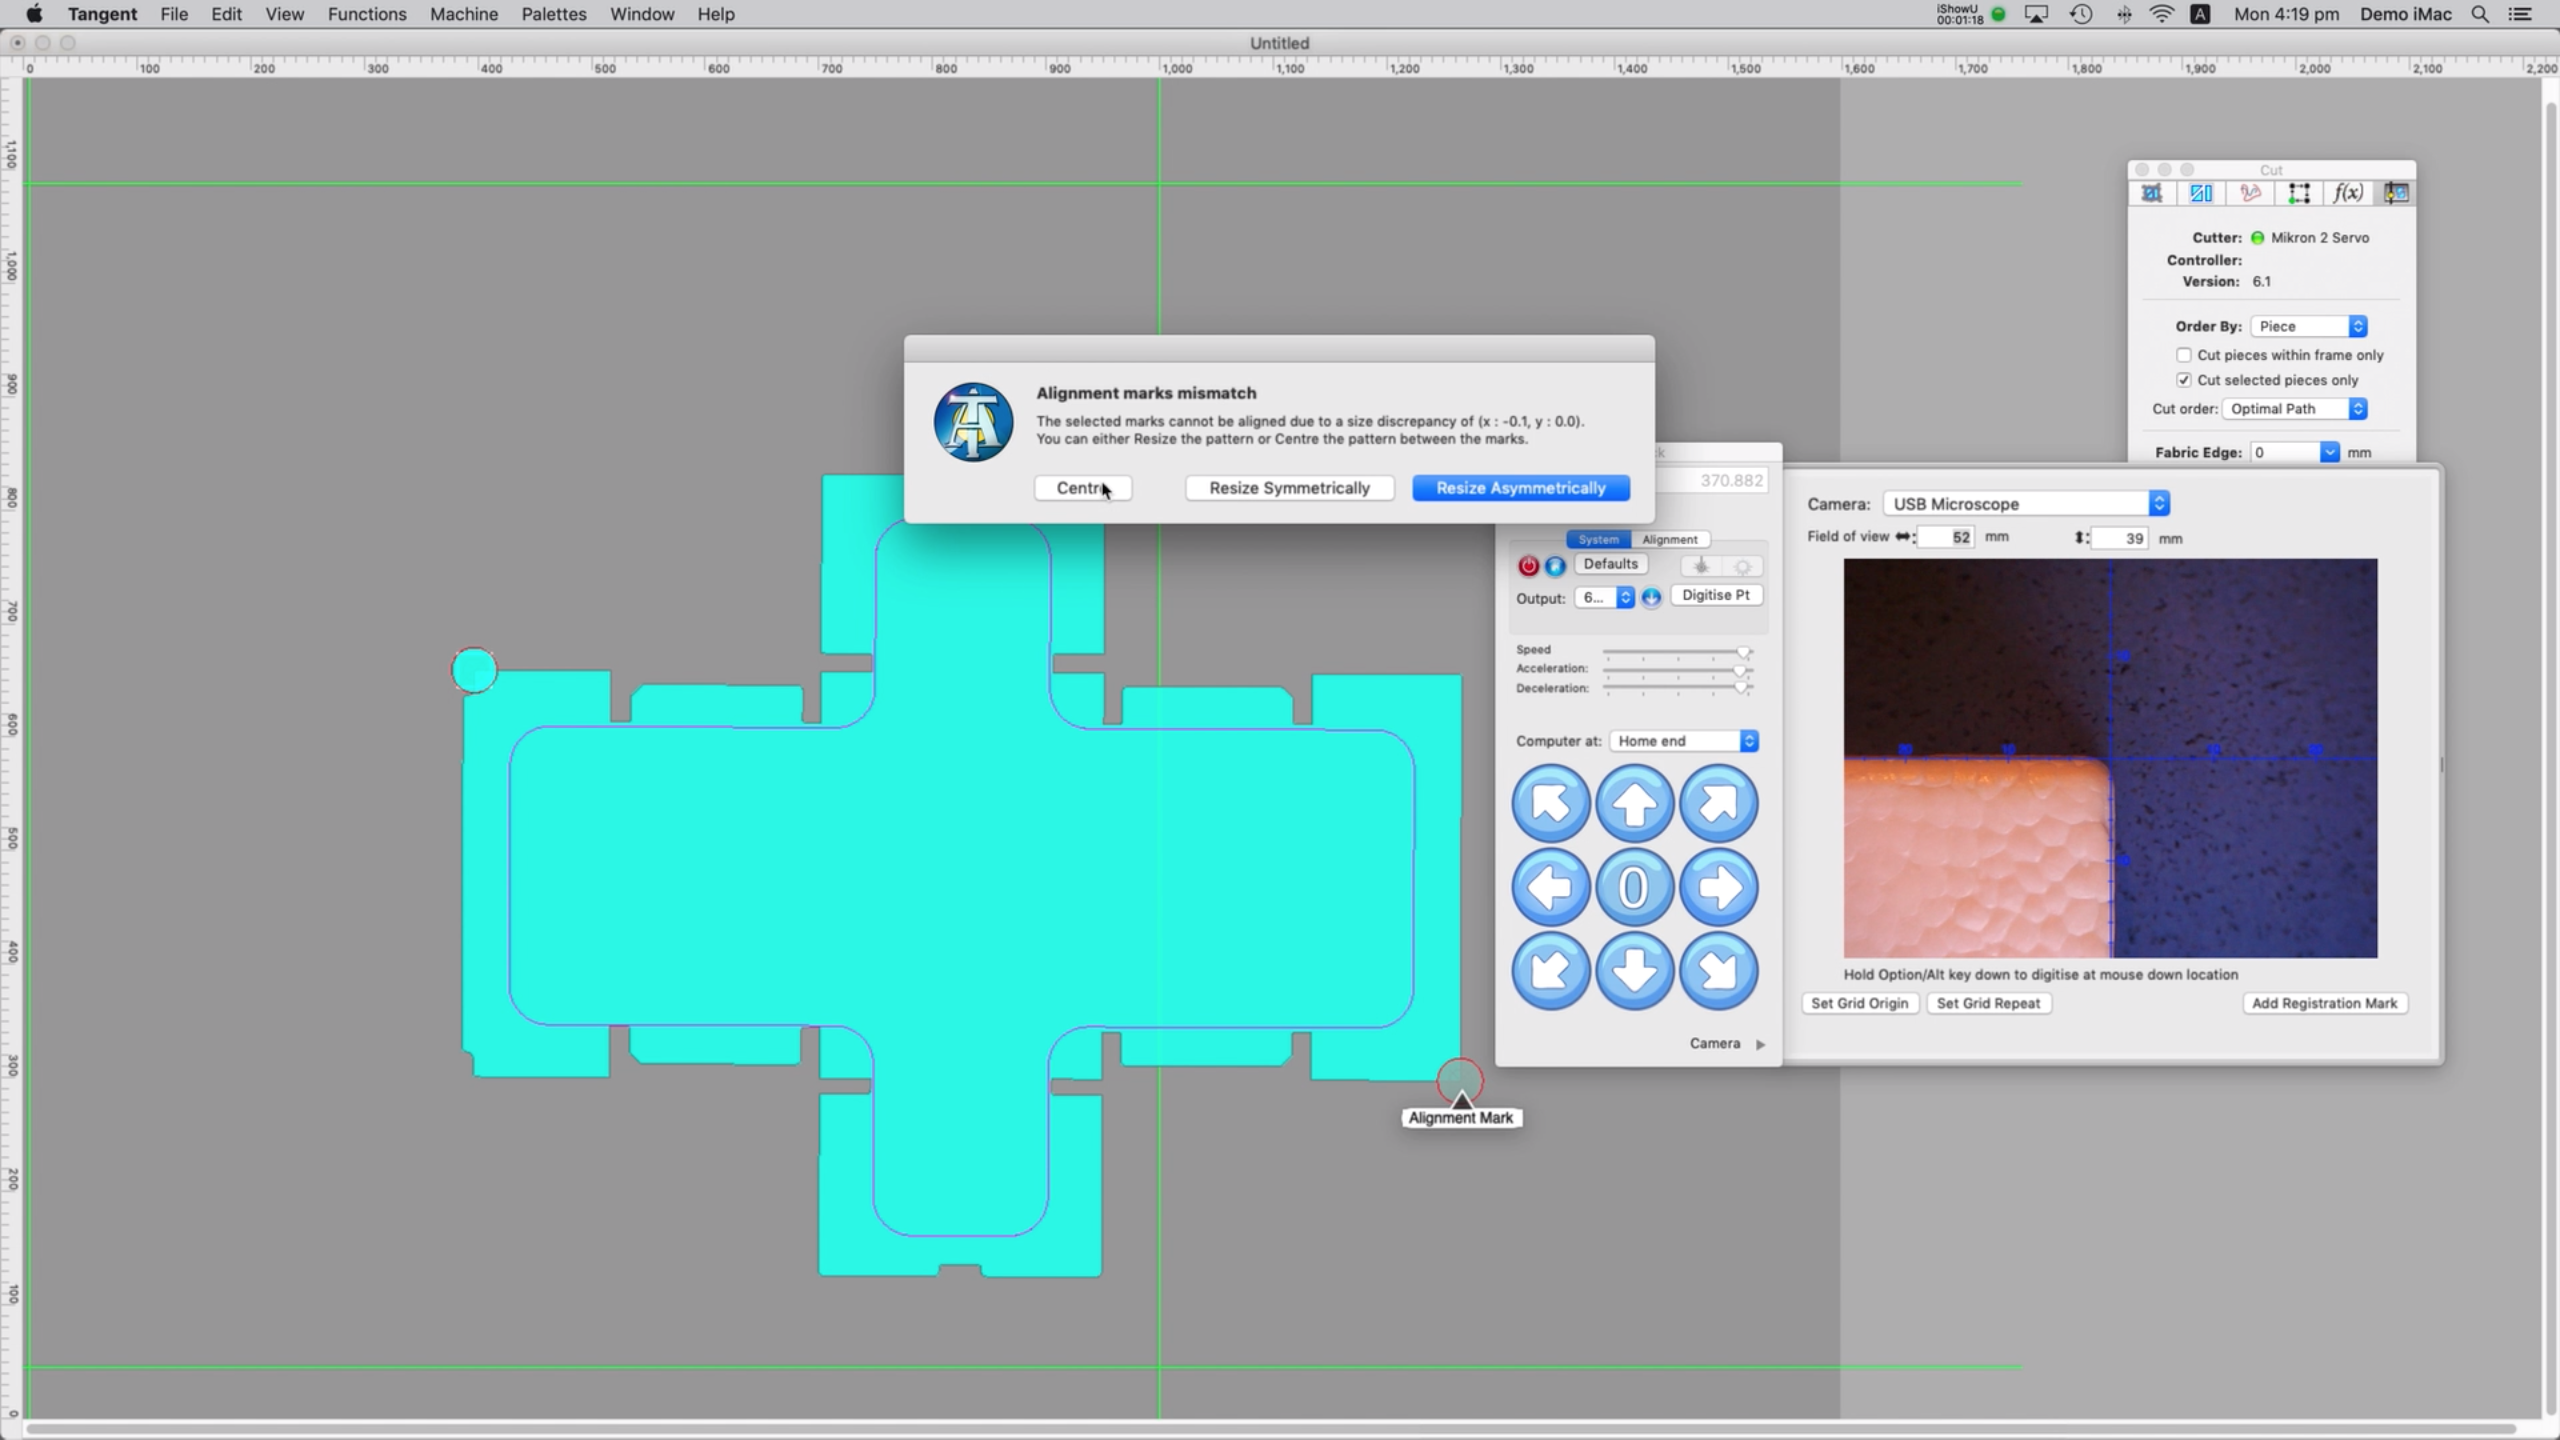
Tangent will present the below dialog. The right option for you will really depend on the results you're hoping to achieve. As we have a fixed size, centring the pattern in the correct option, however if matching a print with bleed present was your goal, scaling may be more appropriate.
If you'd like verify that that everything is located correctly before you cut, press command + P to bring up the cut window and set the tool to Cyclops and the cut speed to something around 100mm/s.
When you press cut, watch the Cyclops window as it bullseyes your pattern.
Once you've checked everything, the only thing left is to cut!